The last post was long. It was a lot of explaining regarding the code, and hopefully, that put things a bit into context.
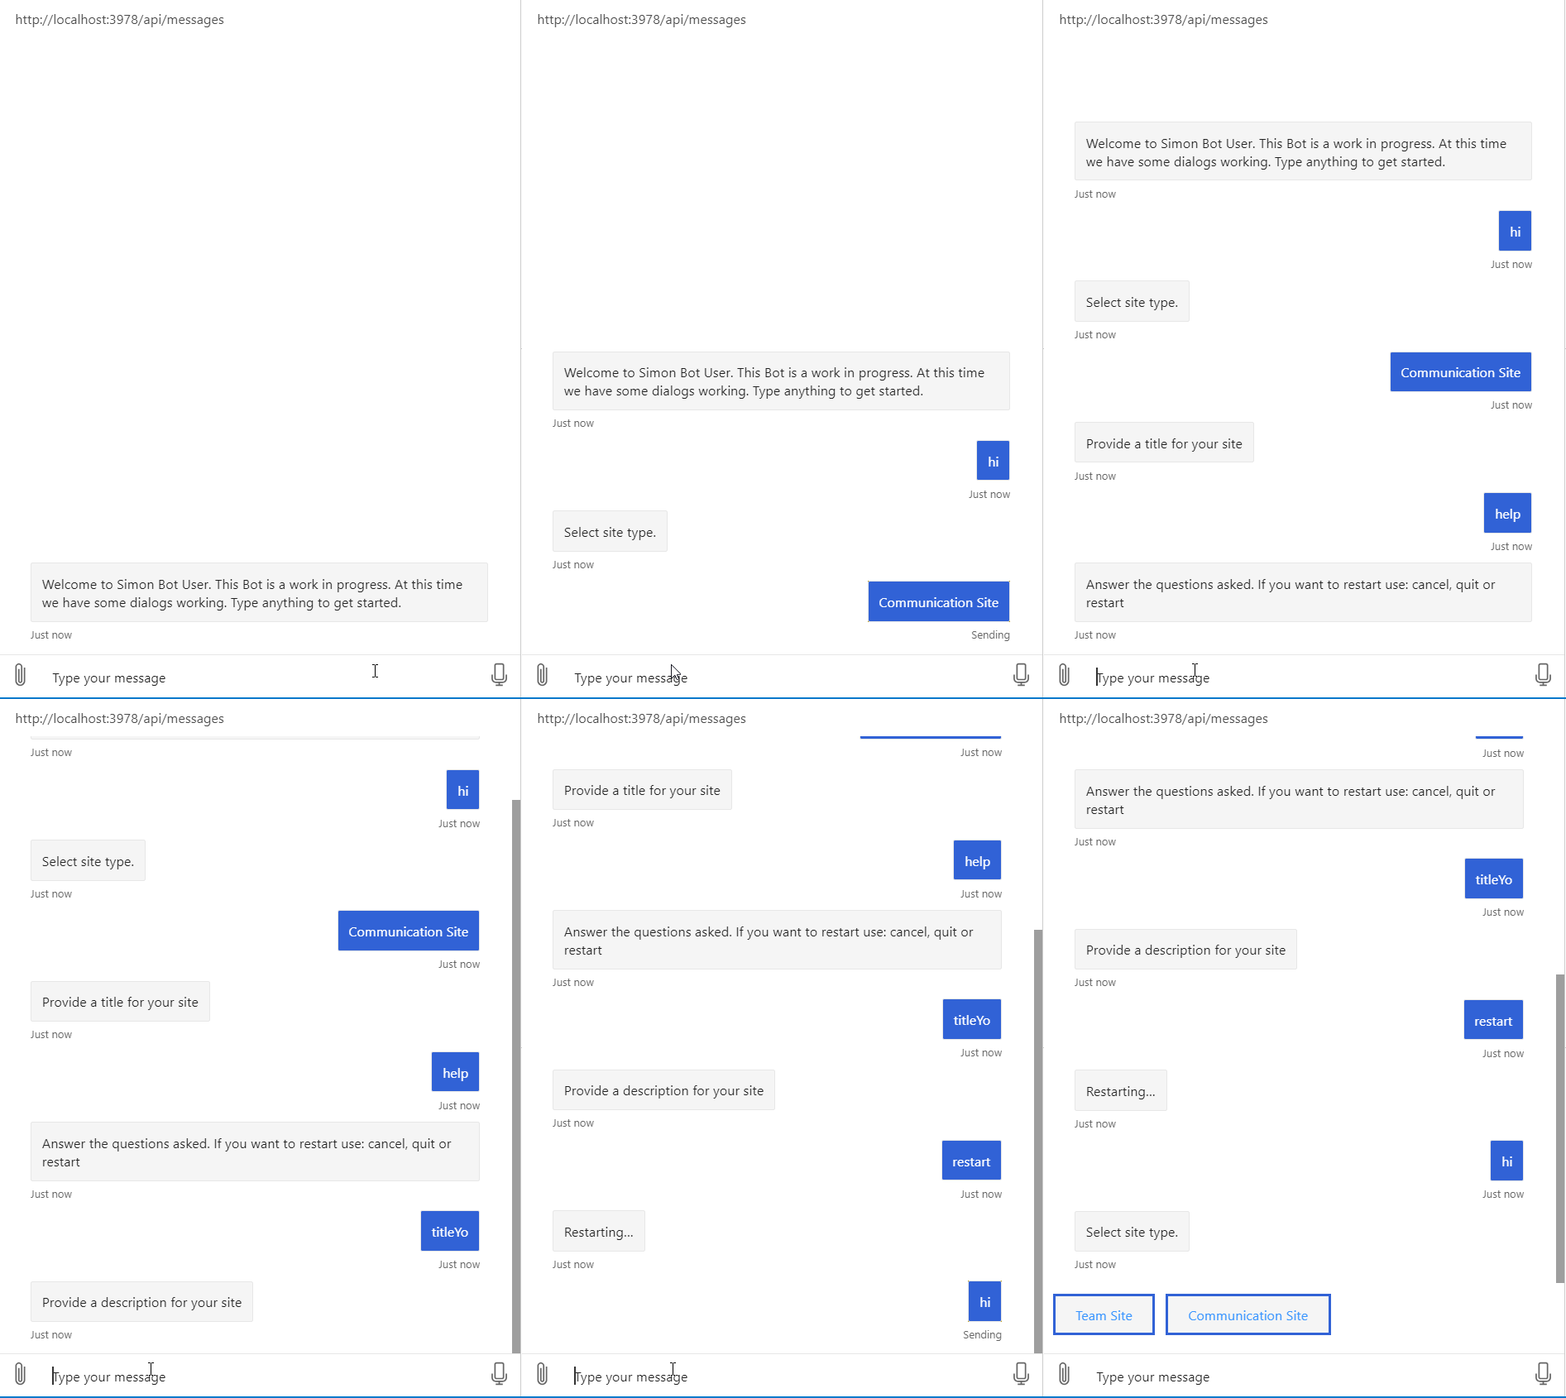
This post will be shorter and focus on how to handle user interruptions. Currently, the only option in the Bot is to follow the conversation step by step. There is no way to get help and restart the Bot.
What we will build today
Sourcecode
Here is the link to the Github repository for this post: https://github.com/simonagren/simon-blog-bot-v4
Prerequisites
- Bot Emulator
- Node.js 10.4+
- Visual Studio Code
- An Azure Account
- Office 365 dev tenant - for Microsoft Teams
- Ngrok
- App Studio installed in Teams
Project changes
This is a high-level visualization of how the Bot is built:
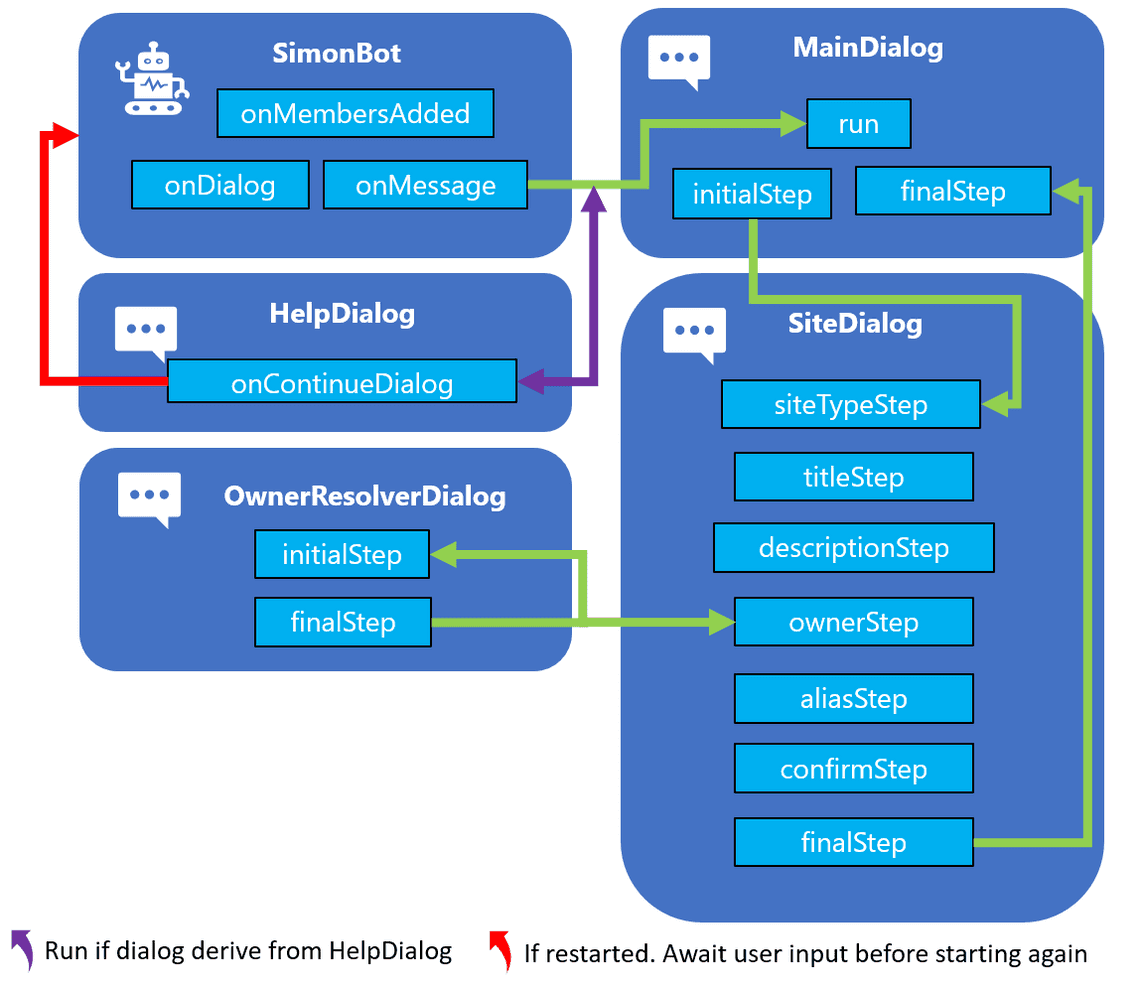
We will incorporate another component dialog to handle the user asking for help or wanting to restart the conversational flow. In the upcoming post, we will also add some log out-logic to this dialog.
This dialog will inherit from componentDialog
export class HelperDialog extends ComponentDialog {
We want to check every time the user writes something if there is a help or cancel command. We change siteDialog and ownerResolverDialog to inherit from HelperDialog in order to enable this:
export class SiteDialog extends HelperDialog {
export class OwnerResolverDialog extends HelperDialog {
HelperDialog
Every time a dialog that derives from this component dialog is run, we will check for user interruption. We have added onContinueDialog that is a overridden method from ComponentDialog.
interruption
A method has been added to check if the user has written anything that corresponds to the helper dialog actions. If the user is asking for ? or help we send a message back with information, and then the DialogTurnStatus.waiting makes sure we wait for user input before continuing
On the other hand, if the user writes cancel, quit or restart we will cancel all the dialogs with cancelAllDialogs()
private async interruption(dc: DialogContext): Promise<DialogTurnResult|undefined> {if (dc.context.activity.text) {const text = dc.context.activity.text.toLowerCase();switch (text) {case 'help':case '?':const helpMessageText = 'Answer the questions asked. If you want to restart use: cancel, quit or restart';await dc.context.sendActivity(helpMessageText, helpMessageText, InputHints.ExpectingInput);return { status: DialogTurnStatus.waiting };case 'cancel':case 'quit':case 'restart':const cancelMessageText = 'Restarting...';await dcc.context.sendActivity(cancelMessageText, cancelMessageText, InputHints.IgnoringInput);return await dc.cancelAllDialogs();}}}
onContinueDialog
We will call the interruption method every time we receive a message from the user. If the user has written something that’s not equal to any of the commands in the HelperDialog, we will just continue as normal.
public async onContinueDialog(dc: DialogContext): Promise<DialogTurnResult> {const result = await this.interruption(dc);if (result) {return result;}return await super.onContinueDialog(dc);}
Main Dialog
As explained earlier, the main dialog consists of two steps initialStep and finalStep. The initial step will kick off the siteDialog and then the final step will collect the result.
If the user restarts the dialog the stepContext.result will return null in the finalStep. We will not collect any values from the siteDialog and for now, just end the dialog. The user must write something again to start it again.
You can see it beneath:
private async finalStep(stepContext: WaterfallStepContext): Promise<DialogTurnResult> {if (stepContext.result) {const result = stepContext.result as SiteDetails;const msg = `I have created a ${ JSON.stringify(result) }`;await stepContext.context.sendActivity(msg);}return await stepContext.endDialog();}
Next step
In the next post, we will look at how to secure the Bot and give the user the ability to log in and then call Microsoft Graph, utilizing the Azure Bot service built-in authentication abilities.


