Table Of Contents
In the previous post, we had a look at user interruptions.
In this post, we will look at how to secure the Bot and give the user the ability to log in (and out) and then call Microsoft Graph. We will utilize the Azure Bot service built-in authentication abilities.
| Bot Framework in Node.js | Complimentary post |
|---|---|
| Let’s begin (Part 1) | Bot Framework 4 ARM template Deploy with Key Vault |
| Microsoft Teams (Part 2) | |
| Dialogs (Part 3) | |
| Interruptions (Part 4) | |
| Auth and Microsoft Graph (Part 5) | Azure AD & Microsoft Graph permission scopes, with Azure CLI |
| Azure AD & Microsoft Graph OAuth Connection, with Azure CLI | |
| Calling Microsoft Graph (Part 6) |
What we will build today
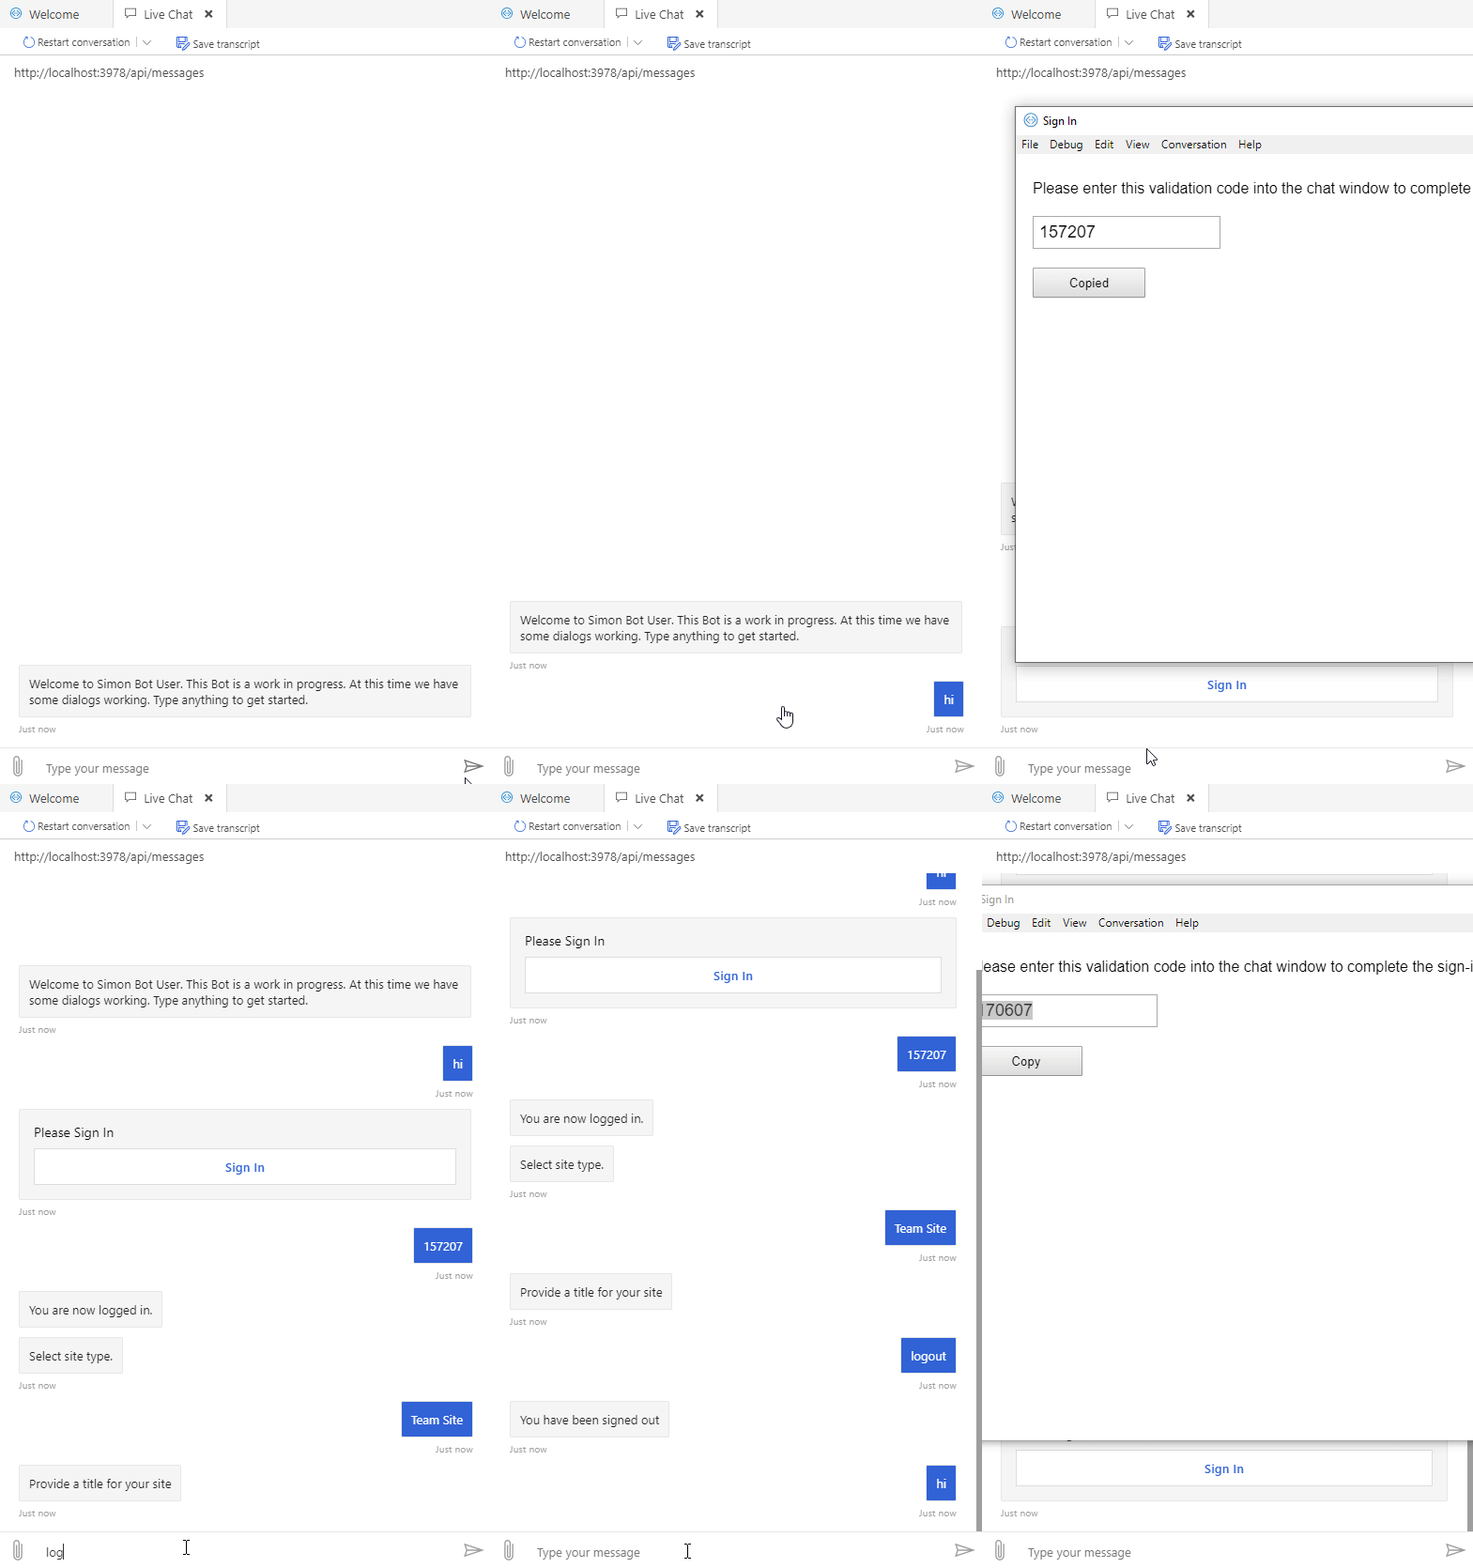
Sourcecode
Here is the link to the Github repository for this post: https://github.com/simonagren/simon-blog-bot-v5
Prerequisites
- Bot Emulator
- Node.js 10.4+
- Visual Studio Code
- An Azure Account
- Office 365 dev tenant - for Microsoft Teams
- Ngrok
- App Studio installed in Teams
Register a new Azure AD Application
In the first post, we created an Azure AD App Registration, and that was for the channel authentication and making sure we don’t receive messages from somewhere we shouldn’t.
The last time we used Azure CLI. It was less complicated since we just needed the appId and appSecret, we didn’t need to add any permission scopes.
In this post, we will create the App registration and add the connection using the portal.
Using Azure CLI
I did make two additional posts as a “bonus” to find the scopes we want to use, create the AD Application with them, and then create the connection from the Bot to the application - all by using Azure CLI.
- Azure AD & Microsoft Graph permission scopes, with Azure CLI
- Azure AD & Microsoft Graph OAuth Connection, with Azure CLI
Using the portal
Register AD Application
Go to the Azure Active Directory blade in the Azure Portal, then App registrations and New registration. Fill in the values and set the redirect URI to https://token.botframework.com/.auth/web/redirect, then register.
As always, take notes of the appId and tenantId

Create a new never expiring secret and make note of the value.

Under API Permissions, we are going to add Microsoft Graph delegated permission scopes. In this case, we added openid, profile, and Group.Read.All (User.Read was already there).
The Group.Read.All require Admin consent. We don’t need it now, but I did want to prepare us for upcoming posts. Make sure you admin consent in whatever way you find feasible.

Create Connection from the Bot
Got to your Bot Channels Registration, into settings and under OAuth Connection Settings press Add setting. Fill in a new name, I’m using Azure AD V2, the appId, secret, and the tenantId. The scopes are case sensitive and separated by one single space.

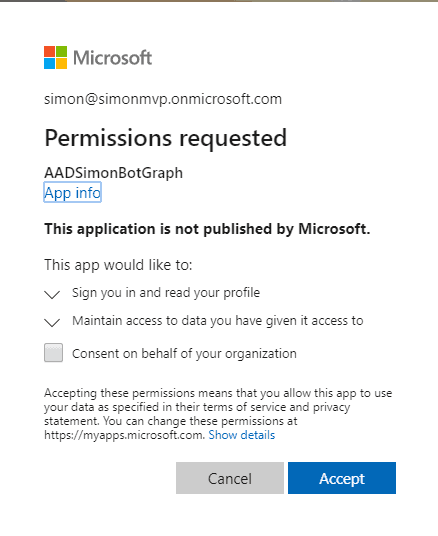
And after saving, you could click on the connection and test connection as well. First, you need to consent and then you could get a token.

Add connection to .env
We add the name of the connection we just created into the .env file. For production scenarios, we have to also add the connectionName to the Azure App Service application settings.
MicrosoftAppId=<idToFirstAADregistration>MicrosoftAppPassword=<secretToFirstAADregistration>connectionName=GraphConnection
Project changes
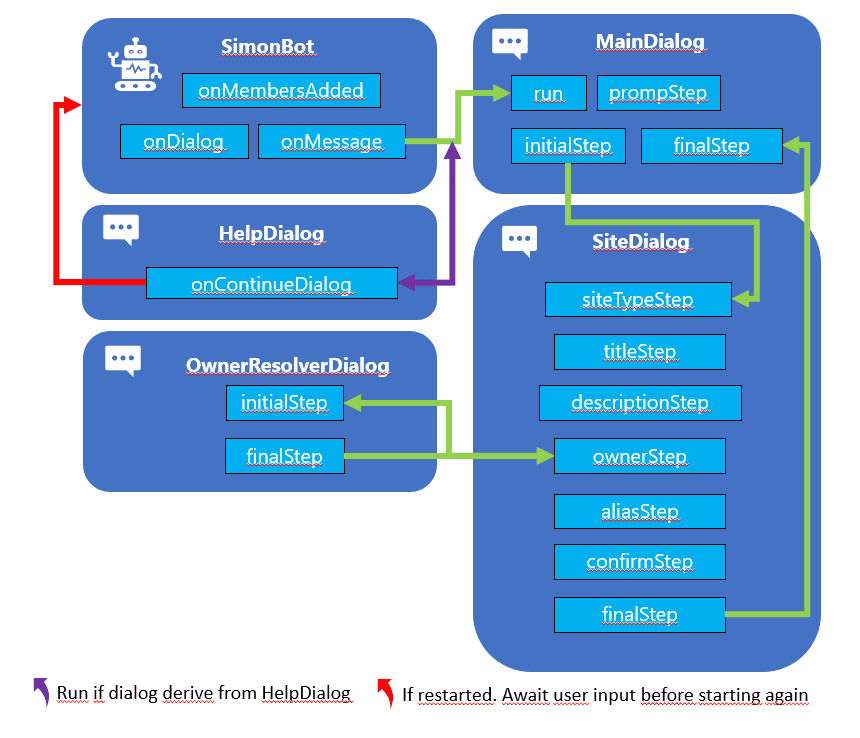
This is a high-level visualization of how the Bot is built:
bot.ts
Since we want to use the Bot in Microsoft Teams later, we will change so the Bot no longer derived from ActivityHandler, instead TeamsActivityHandler.
export class SimonBot extends TeamsActivityHandler {
We also add two more methods
onTokenResponseEvent
In non-Teams situations, we need to implement the onTokenResponseEvent to make sure the dialog is run with the new token response event.
this.onTokenResponseEvent(async (context, next) => {console.log('Running dialog with Token Response Event Activity.');// Run the Dialog with the new Token Response Event Activity.await (this.dialog as MainDialog).run(context, this.dialogState);// By calling next() you ensure that the next BotHandler is run.await next();});}
handleTeamsSigninVerifyState
And in Teams situations, we need to implement handleTeamsSigninVerifyState, because Teams handles it a bit differently.
protected async handleTeamsSigninVerifyState(context: TurnContext, query: SigninStateVerificationQuery): Promise<void> {await (this.dialog as MainDialog).run(context, this.dialogState);}
mainDialog
In the main dialog, we import the OAuthPrompt, add a new constant
const OAUTH_PROMPT = 'OAuthPrompt';
And then add promptStep and the OAuthPrompt using the connection.
this.addDialog(new SiteDialog(SITE_DIALOG)).addDialog(new WaterfallDialog(MAIN_WATERFALL_DIALOG, [this.promptStep.bind(this),this.initialStep.bind(this),this.finalStep.bind(this)])).addDialog(new OAuthPrompt(OAUTH_PROMPT, {connectionName: process.env.connectionName,text: 'Please Sign In',timeout: 300000,title: 'Sign In'}));
promptStep
The prompt step only kicks off the new login prompt.
private async promptStep(stepContext: WaterfallStepContext): Promise<DialogTurnResult> {return await stepContext.beginDialog(OAUTH_PROMPT);}
initialStep
The initial step is changed. It will now get the token from the previous step in the stepcontext.result.
An important thing to notice is that we don’t save the token. The idea is to call the prompt again when we need the token. If the user is still logged in it will just send back a token. Otherwise, the user will have to log in again - so there’s no need to save the token locally since we could end up with expired tokens.
If we didn’t get a token, the login wasn’t successful.
private async initialStep(stepContext: WaterfallStepContext): Promise<DialogTurnResult> {const tokenResponse = stepContext.result;if (tokenResponse) {await stepContext.context.sendActivity('You are now logged in.');const siteDetails = new SiteDetails();return await stepContext.beginDialog('siteDialog', siteDetails);}await stepContext.context.sendActivity('Login was not successful please try again.');return await stepContext.endDialog();}
Adding the possibility to log out
We add another case logout to the HelperDialog that we added in part 4 (interruptions).
Using the signOutUser() method in the BotFrameworkAdapter to sign out the user, and then cancel all the dialogs.
private async interruption(dc: DialogContext): Promise<DialogTurnResult|undefined> {if (dc.context.activity.text) {const text = dc.context.activity.text.toLowerCase();switch (text) {case 'help':case '?':const helpMessageText = 'Answer the questions asked. If you want to restart use: cancel, quit or restart';await dc.context.sendActivity(helpMessageText, helpMessageText, InputHints.ExpectingInput);return { status: DialogTurnStatus.waiting };case 'cancel':case 'quit':case 'restart':const cancelMessageText = 'Restarting...';await dc.context.sendActivity(cancelMessageText, cancelMessageText, InputHints.IgnoringInput);return await dc.cancelAllDialogs();case 'logout':const adapter: any = dc.context.adapter;await adapter.signOutUser(dc.context, this._connectionName);const logoutMessageText = 'You have been signed out';await dc.context.sendActivity(logoutMessageText, logoutMessageText, InputHints.IgnoringInput);return await dc.cancelAllDialogs();}}}
Test login
Run the local Bot by using
npm startStart the emulator and check the settings at first.
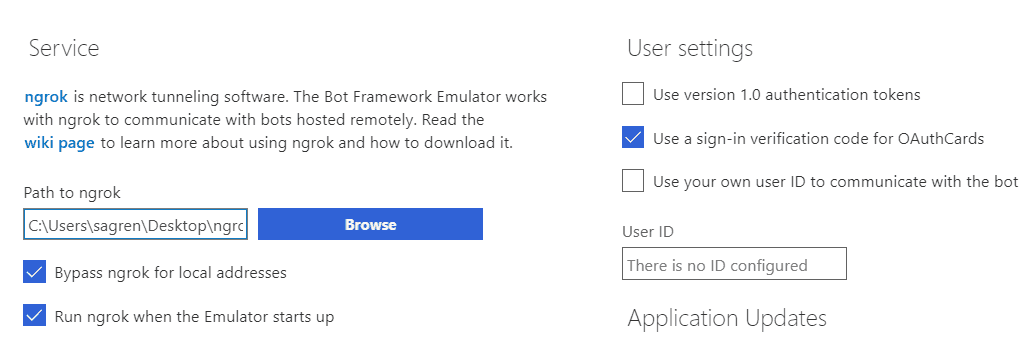
I had some issues getting the login to work. Your best bet is to download the latest emulator, and these are the settings that work well for me:
Then connect to the Bot from the emulator using http://localhost:3978/api/messages and the
appIdandsecret.Write something to kick off the dialogs. And the press login, and open the window.
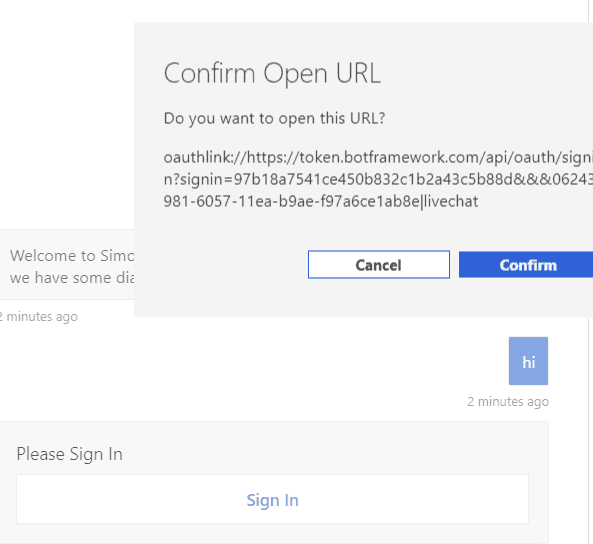
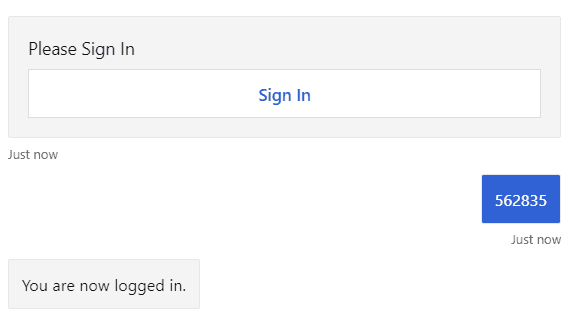
This opens a window where you can copy the verification code and message back to the Bot. Then you receive your token.
Login in Teams
We need to make some changes to the manifest in App Studio for the login to work. Right now the window would not open.
As we did in Microsoft Teams (Part 2), we will start App studio from Microsoft Teams and edit the manifest of our Teams App.
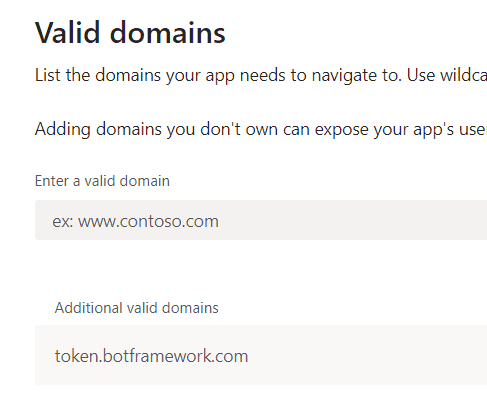
Under domain and permissions we need to add token.botframework.com as a supported host, this will allow the popup to be opened.
Spin up ngrok again ngrok http 3978 —host-header=localhost
Then we could go to Azure once again and change the messaging endpoint in the Bot Channels Registration to point to the https://<ngrokUrl>/api/messages
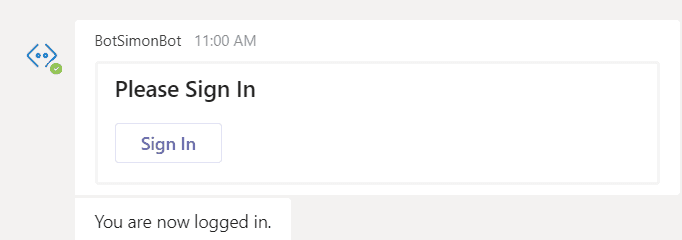
Now if you write something to the Bot in Teams, you get a similar login experience

If you press Sign In Teams will open a window briefly, and then close it to get you the token.
And we are logged in
Next step
In the next post, we will add some helpers and enable the user to utilize the Microsoft Graph. We will create an example using both the Microsoft Graph Client and PnPjs Graph for hooking into the Azure Bot Service auth-flow.


