Table Of Contents
The posts in this series
- Part 1 - Azure Functions V2 + VS Code + PnPJs === true
- Part 2 - Azure Functions V2 + VS Code + PnPJs === true
- Part 3 - Azure Functions V2 + VS Code + PnPJs === true
- Part 4 - Azure Functions V2 + VS Code + PnPJs === true
I this post we will use the Azure CLI to create an Azure Key Vault, register our secrets in the vault, create the permissions required for us to access the keys.
After everything is set up we will call both SharePoint and the Graph via PNPJs to create a Microsoft Team based on the Group of a Modern Team site.
As we will be using Application Permissions to call the Graph we need to have a registered “app” in our Azure AD, so we get an Id and Secret. Have a look in This blog post of mine to see how you could register one.
Let’s get to it!
Prerequisites
Install Azure CLI globally
npm install -g azure-cli
Azure Key Vault
Now let’s use a best practices approach, the Azure Key Vault for getting our secrets.
Create a Key Vault with Azure CLI
Login to Azure with:
az login
(Optional) You could create a new Resource Group by running:
az group create --name myResourceGroup --location northeurope
I’m using the same resource group we created earlier with the app. So let’s get the name by using:
az group list
Create an Azure Key Vault
az keyvault create --name "simonsfuncvault" --resource-group "funcresourcegroup" --location "North Europe"
Add our secrets to the vault
az keyvault secret set --vault-name "simonsfuncvault" --name "spSecret" --value "<SECRET>"
az keyvault secret set --vault-name "simonsfuncvault" --name "graphSecret" --value "<SECRET>"
Some code to work with
- Open a Node console and get the prepared solution from my Github and I’ll walk you through the code, in just a moment.
git clone https://github.com/simonagren/keyvaultfunc.git
- cd into the folder and restore dependencies
npm install
- Open in Visual Studio Code
code .
If you look in the package.json you can see that we have added three additional dependencies we need for our project. Note that it includes the @pnp/graph package since we will be calling the Graph as well. These are those we added:
ms-rest-azure@pnp/graphazure-keyvault
Create an app and publish via CLI
We could of course, just as in Part 2 deploy via the Extension in VS Code. But I wanted to show you how it’s done via CLI.
We already know/created a resource group. But let’s find our storage Account:
az storage account list
Create the app
az functionapp create --name pnptesting --storage-account pnphttptrigger98d7 --consumption-plan-location northeurope --resource-group
Publish app
As I mentioned earlier we need to have both an app registered in SharePoint, and an app registered in our Azure AD with read/write permissions to Groups in the Graph.
Edit the local.settings.json and enter your:
- spId
- spTenantUrl
- graphTenant
- graphId
Let’s deploy with our local settings:
func azure functionapp publish pnptesting --publish-local-settings -i --overwrite-settings -y
Success!
If you do get any errors
With missing connection string etc. Try to deploy via the VS Code extension UI then, and set the App Settings via the extension as well.
Enable managed service identity on our Azure Function App
We do this for the specific Function App that we created
az functionapp identity assign --name pnptesting --resource-group "funcresourcegroup"
We get a response, make sure to save the principalId that we get.
Set permission policy for the app
Now we use our principalid to give the Function App permissions to get secrets from the Key vault
az keyvault set-policy --name "simonsfuncvault" --object-id <PrincipalId> --secret-permissions get
Let’s go through the code and test our Azure Function
Our imports
const sp = require("@pnp/sp").sp;const SPFetchClient = require("@pnp/nodejs").SPFetchClient;const graph = require("@pnp/graph").graph;const AdalFetchClient = require("@pnp/nodejs").AdalFetchClient;const KeyVault = require('azure-keyvault');const msRestAzure = require('ms-rest-azure');
Getting the secrets
Here we first get a token from the general vault endpoint. Instantiate a KeyvaultClient and get both the SharePoint and Graph secrets.
const vaultUri = "https://simonsfuncvault.vault.azure.net/";// Should always be https://vault.azure.netconst credentials = await msRestAzure.loginWithAppServiceMSI({resource: 'https://vault.azure.net'});const keyVaultClient = new KeyVault.KeyVaultClient(credentials);// Get SharePoint key valueconst spVaultSecret = await keyVaultClient.getSecret(vaultUri, "spSecret", "");const spSecret = spVaultSecret.value;// Get Graph key valueconst graphVaultSecret = await keyVaultClient.getSecret(vaultUri, "graphSecret", "");const graphSecret = graphVaultSecret.value;
Setting up Graph like we have done with SP before
// Setup PnPJs Graph with graphSecret from Key Vaultgraph.setup({graph: {fetchClientFactory: () => {return new AdalFetchClient(process.env.graphTenant,process.env.graphId,graphSecret);},},});
Create a Microsoft Team from the Team Site Group
First, we get the web and select the Title. Then we get and filter all groups to find the one with the same displayName as our Modern Team Site.
We then get that specific group by Id and creates a Microsoft Team via the new createTeam()
// Get the web and select only Titleconst web = await sp.web.select("Title").get();// Filter Office365 groups for any with the same displayName as the web titleconst filtGroups = await graph.groups.filter(`displayName eq '${web.Title}'`).get();let createdTeam;// If only one group. It should only be oneif (filtGroups.length === 1) {// Get the group from the arrayconst group = filtGroups[0];// Create a Team based on that GroupcreatedTeam = await graph.groups.getById(group.id).createTeam({"memberSettings": {"allowCreateUpdateChannels": true},"messagingSettings": {"allowUserEditMessages": true,"allowUserDeleteMessages": true},"funSettings": {"allowGiphy": true,"giphyContentRating": "strict"}});}
Lets call the Azure Function and see what happens
Before
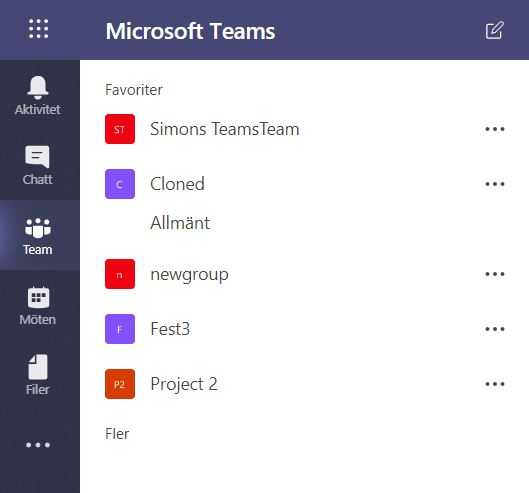
Make the call in the browser or Postman
Make sure that the name of the site you use is a Modern Team Site
https://pnptesting.azurewebsites.net/api/PnPHttpTrigger?site=pnpazurefunc
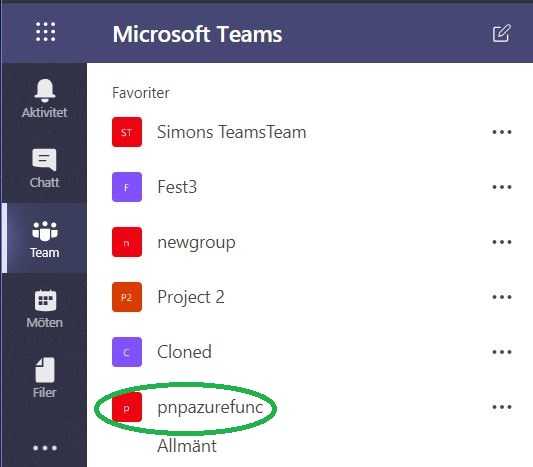
In the browser, you should now have received a message that the Team has been created.
After
Finishing words
The next post will be about securing the Function App with Azure AD.


